
Setting up Proximity Steering using Cloudflare
What is Proximity Steering?
Proximity steering routes visitors ... to the closest physical data center.
Source: Proximity steering
Sometimes also referred to as Geo-Load Balancing.
About this Tutorial
As Railway does not offer native Proximity Steering at this time, we instead need to place Cloudflare in front of our services to do this for us.
This tutorial aims to provide a simple step-by-step guide on setting everything up on Cloudflare to ensure Proximity Steering works flawlessly!
Objectives
In this tutorial, you will learn how to do the following in Cloudflare -
- Create a Health monitor.
- Create pools for each region.
- Set up the Proximity Load Balancer.
Prerequisites
In Railway -
-
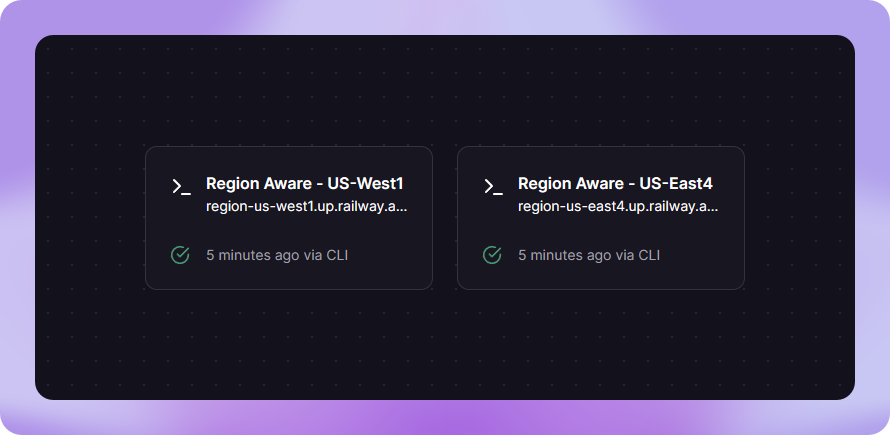
Have two or more identical services deployed in two or more different regions in Railway.
Duplicating a service can be done by right clicking and selecting Duplicate, opening its service settings and changing the region, then clicking Deploy.
The services should be configured with a Railway-generated domain, do not assign a custom domain. It is also helpful to indicate the region in the domain.
It's recommended to use shared variables or reference variables for duplicated services to keep variables in sync.
-
Have a
/healthor similar endpoint in the services deployed to Railway, which should return a 200 status code when queried.This allows Cloudflare to check the health of our Railway services so they can handle region failover. As a bonus this can also be used on Railway to achieve zero-downtime deployments.
In Cloudflare -
-
Have your desired domain setup with Cloudflare's nameservers, they have a general guide for that here.
-
Have SSL/TLS mode set to Full.
SSL/TLS → Overview → Full
-
Have Always Use HTTPS enabled.
SSL/TLS → Edge Certificates → Always Use HTTPS
This ensures that Railway avoids managing the insecure redirect, which would otherwise lead to an incorrect redirection to an upstream endpoint.
1. Creating a Health Monitor
-
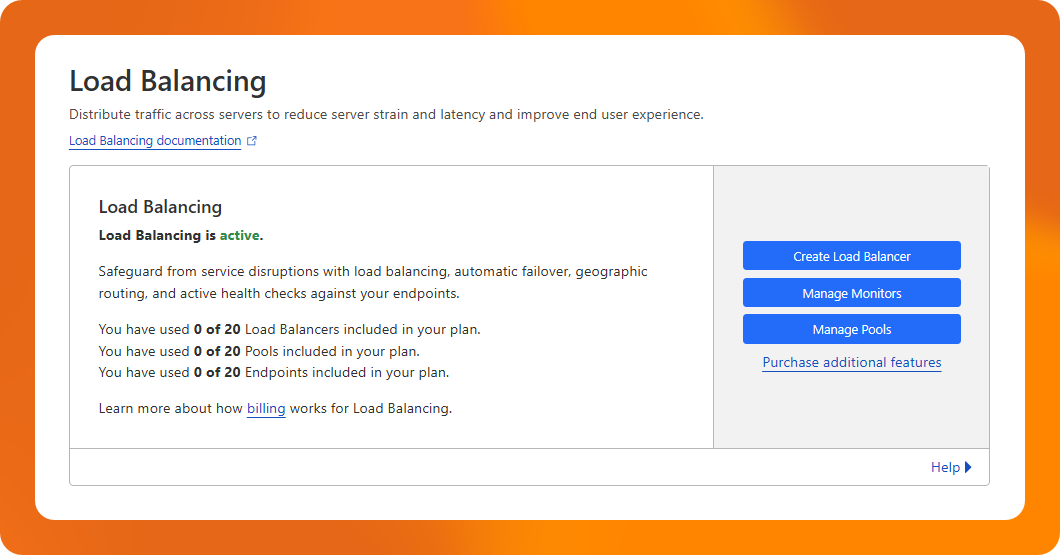
Open the Load Balancing page.
Traffic → Load Balancing
-
Click Manage Monitors and then Create.
-
Enter your desired name for this health monitor.
-
Choose HTTPS as the type.
-
Enter your health endpoint path
Example -
/health -
Leave Port 443 as the default.
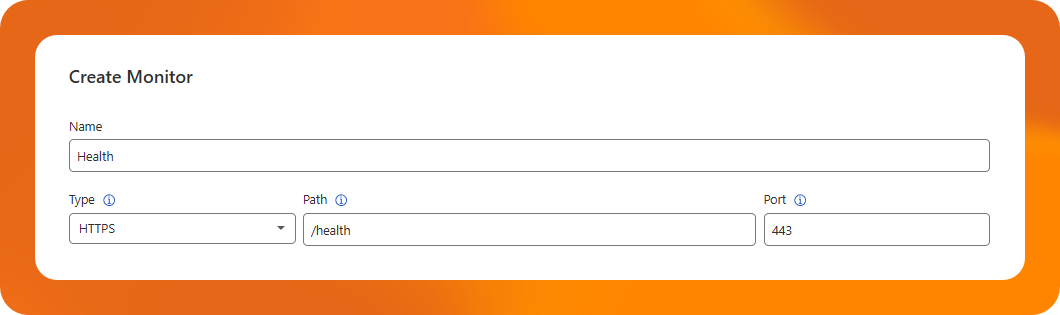
- Click Save.
2. Creating the Pools
-
Go back to the Load Balancing page.
-
Click Manage Pools and then Create.
-
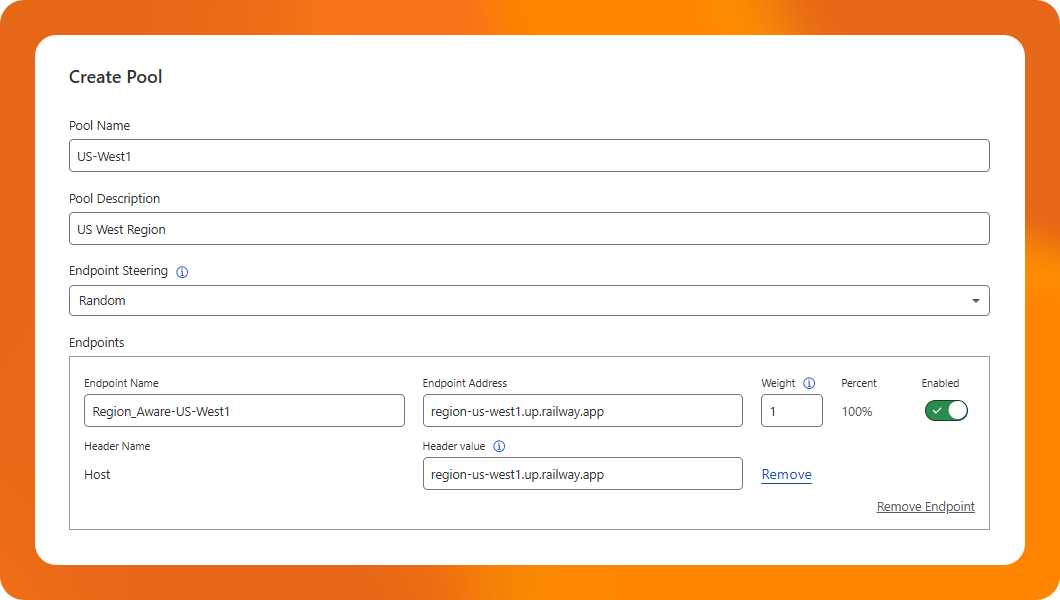
Fill out the name and description and leave Endpoint Steering as its default of Random, it will not be used with only a single endpoint.
-
Enter the endpoint name, using the service name is ideal.
-
For the Endpoint Address we use the Railway generated domain.
Example -
region-us-west1.up.railway.appThis should only be the domain, excluding both the scheme and trailing slash.
-
For the weight option we will use a value of 1.
-
Click Add host header and enter the same value as used for the Endpoint Address.
This step is important since Railway uses host-based routing and requires the host header to know how to route the incoming requests from Cloudflare.
-
Remove the second empty endpoint.
Our pool only needs to contain a single endpoint as Railway handles single region replicas for us.
-
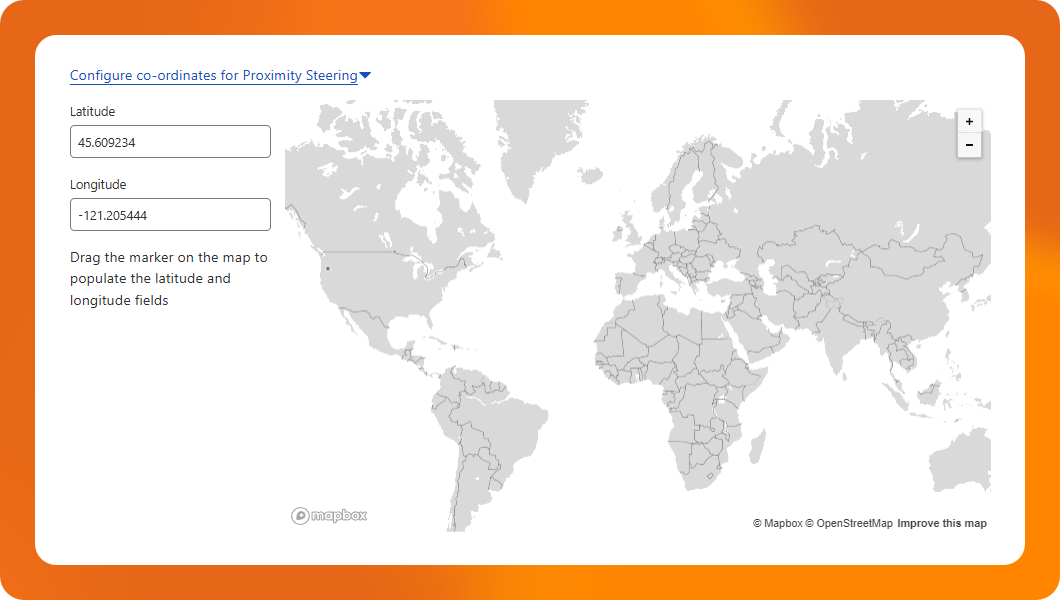
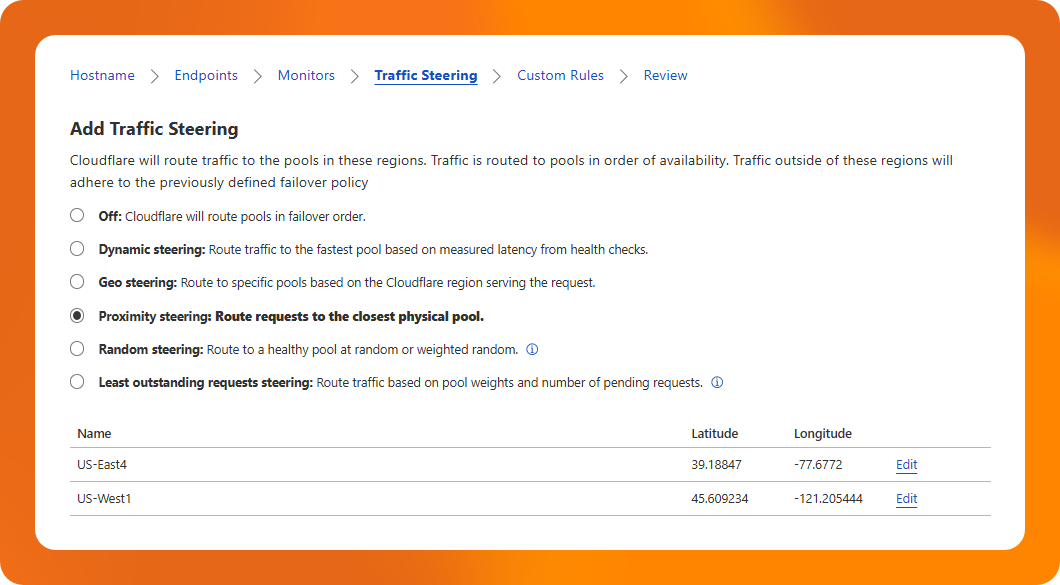
Click Configure coordinates for Proximity Steering and enter the Latitude and Longitude for your service region that can be found in this JSON file.
To find the coordinates of a region, look up its location and copy the corresponding latitude and longitude values into Cloudflare.
You can find information on Railway's available regions and their locations here.
-
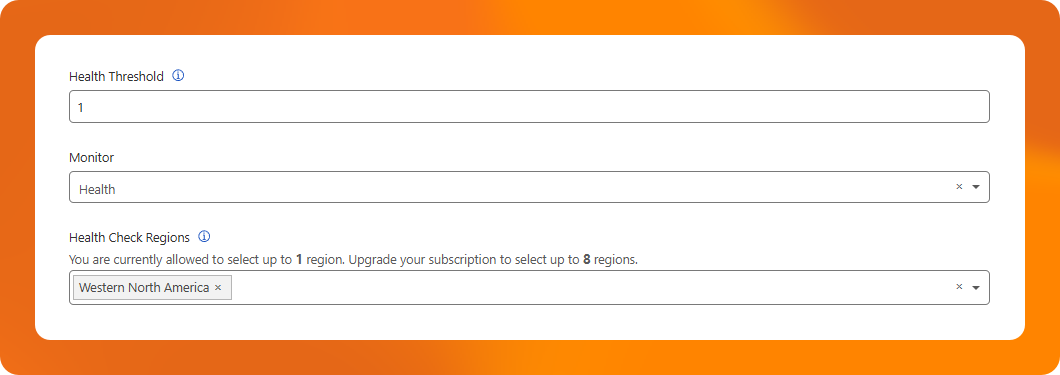
Select the Monitor dropdown and add our Health monitor we created earlier.
-
Choose the applicable health check region according to the region that the Railway service was deployed to.
-
Click Save.
-
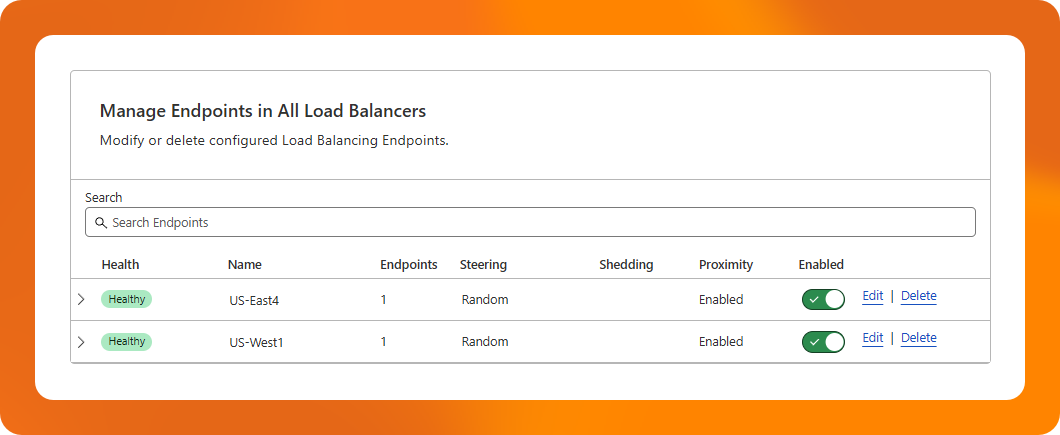
Create another pool for your other services that are deployed into your desired regions, follow the same procedure.
This should be the end result, two or more pools -
3. Creating the Load Balancer
-
Go back to the Load Balancing page.
-
Click Create Load Balancer.
-
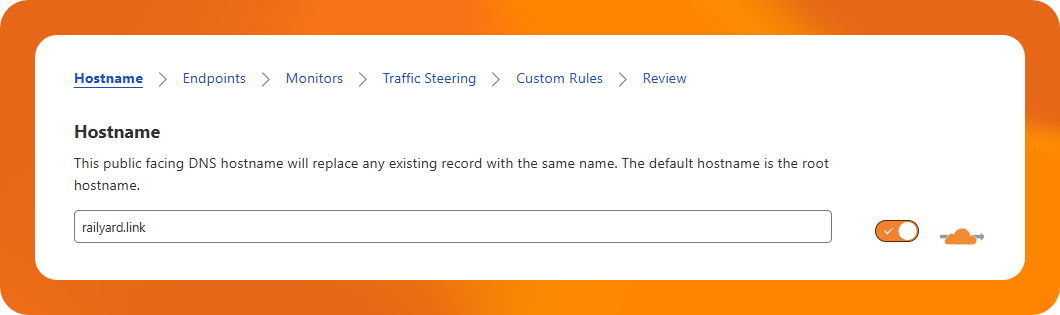
Enter the desired hostname or leave as the default for the root hostname.
You may need to remove the leading period from the default hostname.
-
Click Next.
-
Add all the pools that were previously setup.
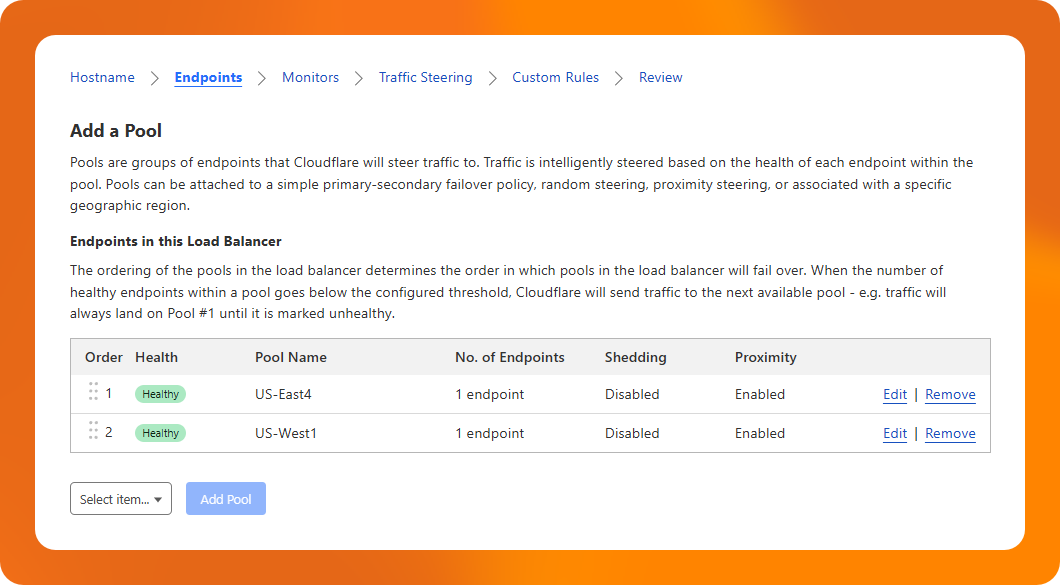
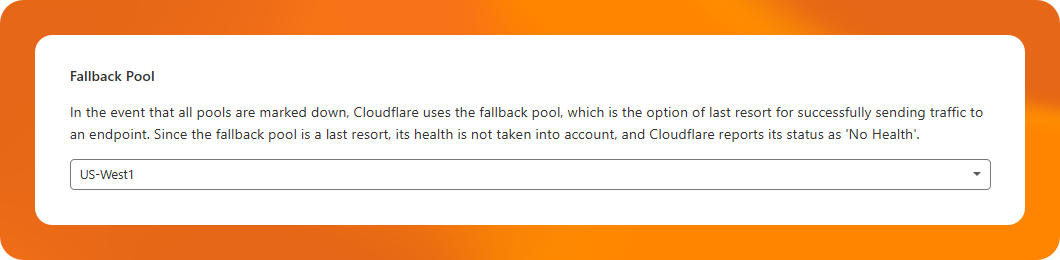
- Select the appropriate fallback pool.
-
Click Next.
-
Monitors have already been setup on both pools, Click Next.
-
Choose Proximity steering.
-
Click Next.
-
If needed, create Custom Rules, otherwise click Next.
-
Review the Load Balancing setup, if all looks good click Save and Deploy.
Conclusion
After that process you should see something like the following -
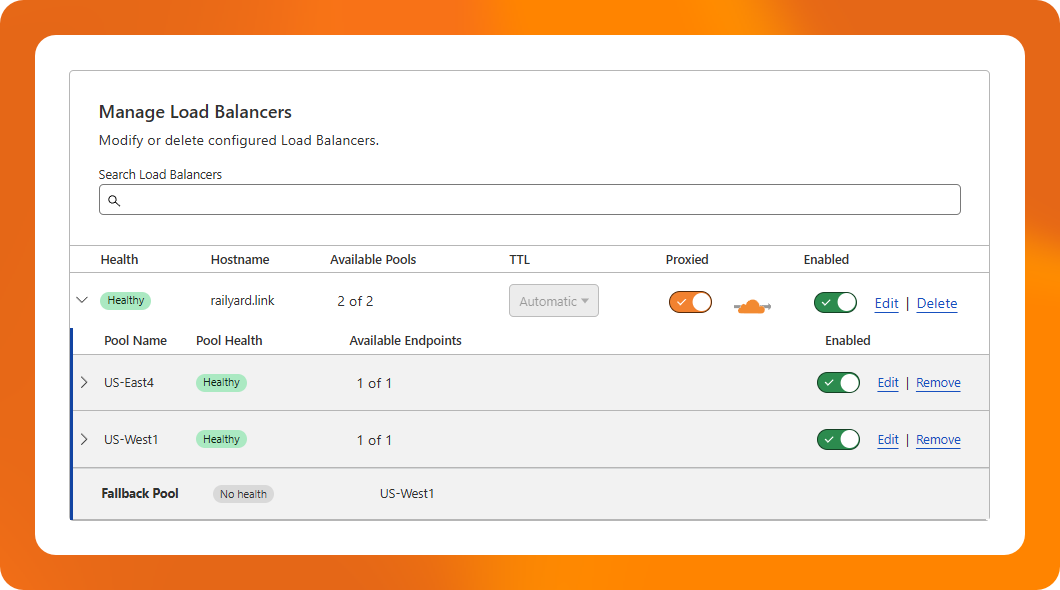
That's all for the setup! You can now open your domain and Cloudflare will automatically route your requests to the Railway service you are in closest proximity to.
Additional Resources
This tutorial covers setting up a Proximity Load Balancer on Cloudflare but does not cover all the settings and configurations Cloudflare offers.
We recommend checking out these resources from Cloudflare:
Edit this file on GitHub