
Deploying a Monorepo to Railway
What is a Monorepo?
A monorepo is a project directory structure in which multiple, co-dependent codebases (such as a frontend and a backend) are maintained within the same repository, and in some cases, share common packages.
About this Tutorial
Deploying a monorepo in Railway requires some extra configuration to get the applications up and running.
This tutorial aims to provide a simple step-by-step on how to deploy a frontend and backend from an isolated monorepo, one of the most commonly deployed types of monorepo.
The procedure outlined in this tutorial can easily be adapted to deploy different apps that are contained within a isolated monorepo as well.
For more information on deploying a shared monorepo check out our guide that explains some of the specific configurations you would need.
Objectives
In this tutorial, you will learn how to -
- Create an empty project.
- Rename a project.
- Create empty services.
- Rename services.
- Generate domains for services.
- Set variables on a service.
- Connect a GitHub repo to a service.
Prerequisites
To be successful using this tutorial, you should already have a monorepo that follows the same structure as the example repo.
Or feel free to use the example repo to follow along!
About the Example repo
To demonstrate the process, a sample monorepo has been prepared -
The frontend is built with React and Vite, and the static files are served with Caddy.
The backend, built with Go, will stream quotes that will be displayed on the frontend.
Let's get started!
1. Create a new empty project
- From your dashboard click
+ New Project
- Choose
Empty project
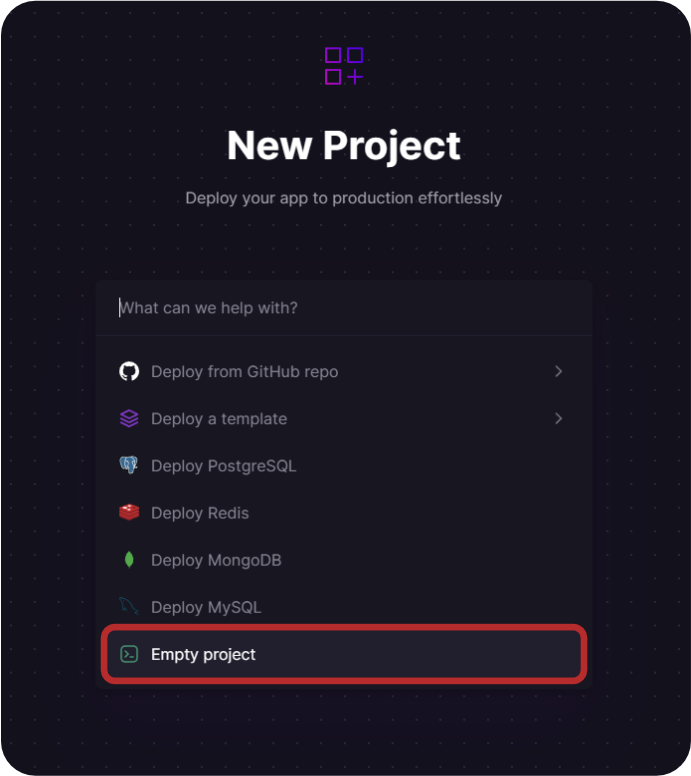
Note: We chose an empty project instead of deploying from a GitHub repo since we want to set up the project before deploying.
2. Project setup
- Give the project an applicable name, this makes the project recognizable in your dashboard. You can do this in the Settings tab on the top right of the page.
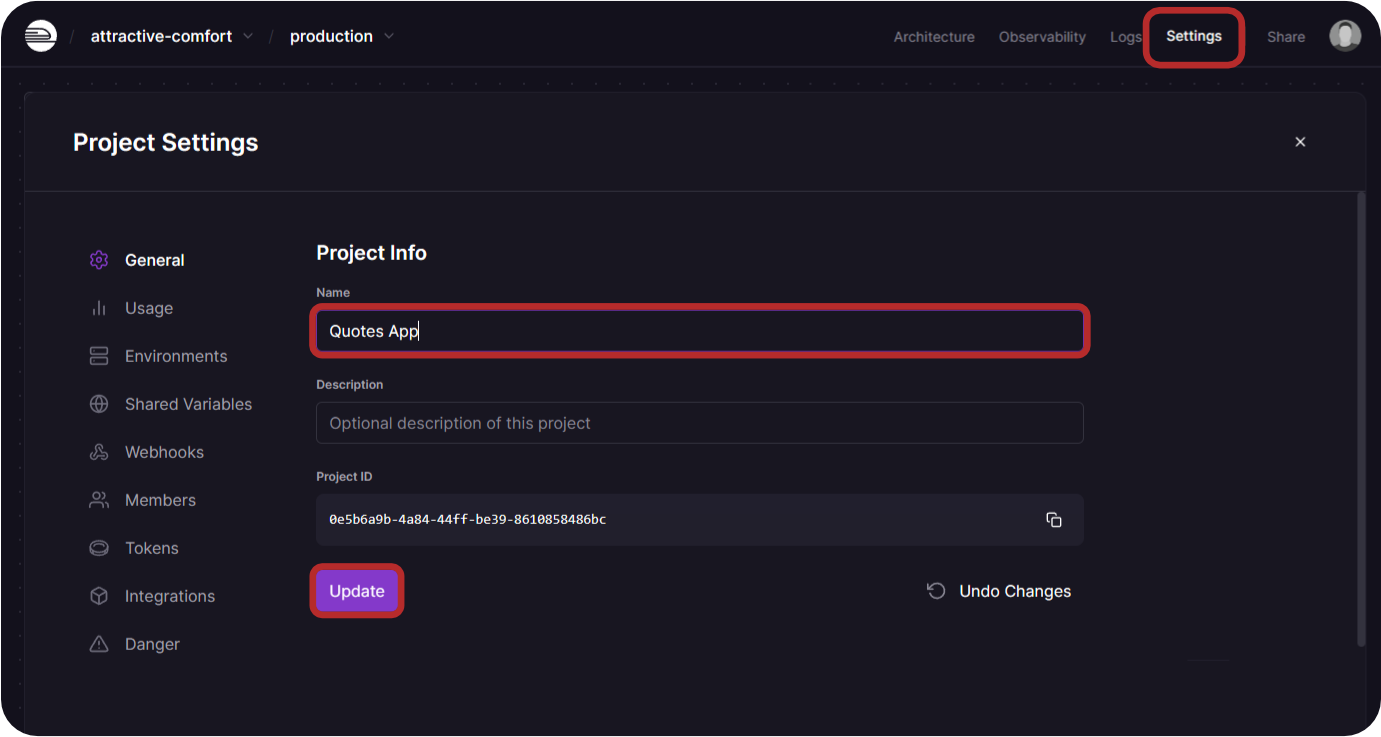
- Click
Update
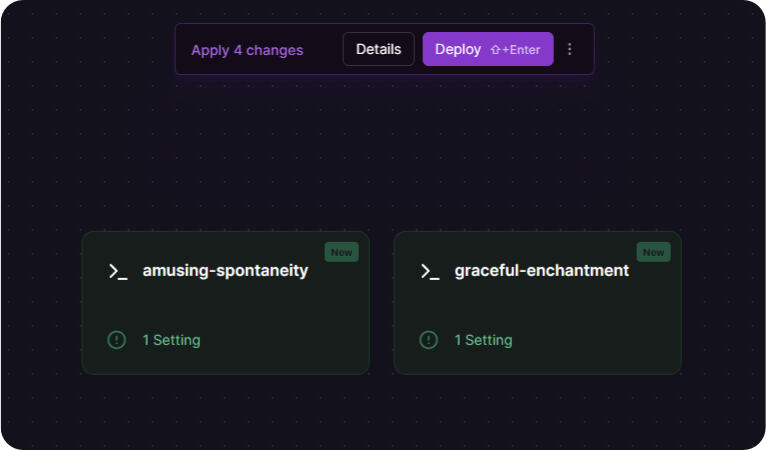
3. Service creation
- Add two new empty services from the
+ Createbutton in the top right of the project canvas.
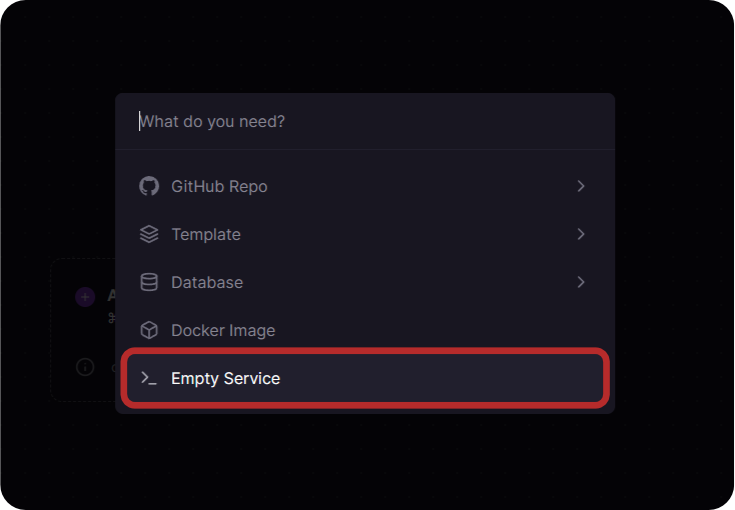
Note: We chose an empty service instead of deploying from a GitHub repo since we want to set up the service before deploying.
The result will look like this -
-
Give them both applicable names.
Note: This can be done easiest via the right-click context menu.
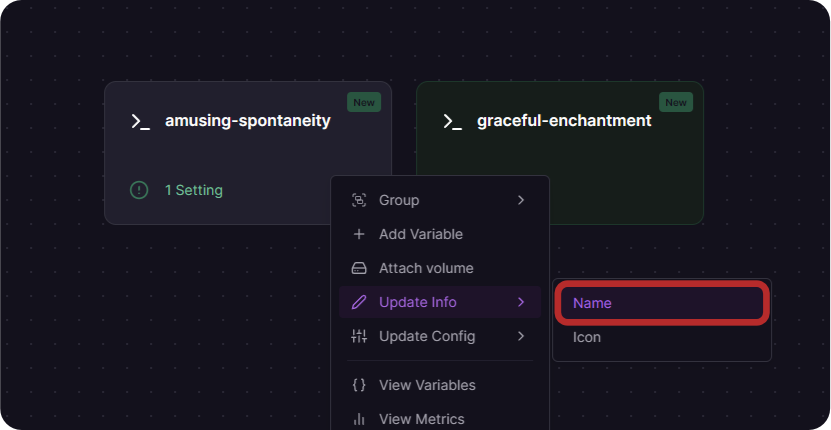
In the case of this tutorial, they will be named Frontend and Backend
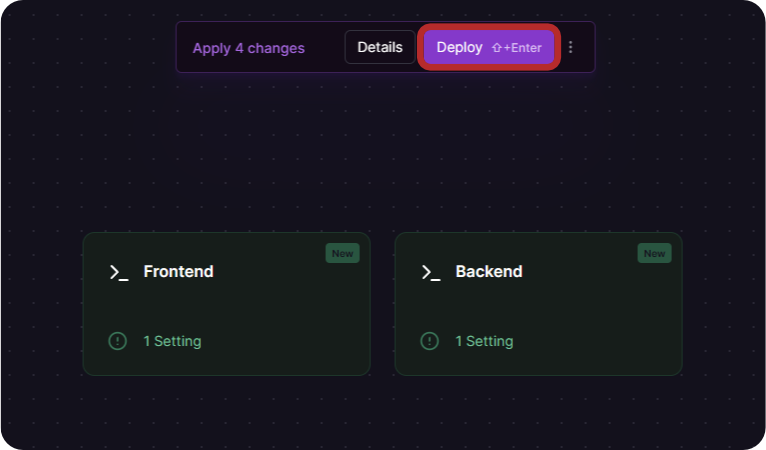
- Click the
Deploybutton to create these two services.
4. Domain setup
Both of these services will need to be exposed publicly, so let's add public domains to both of them -
- Click on the service and then open its settings menu.
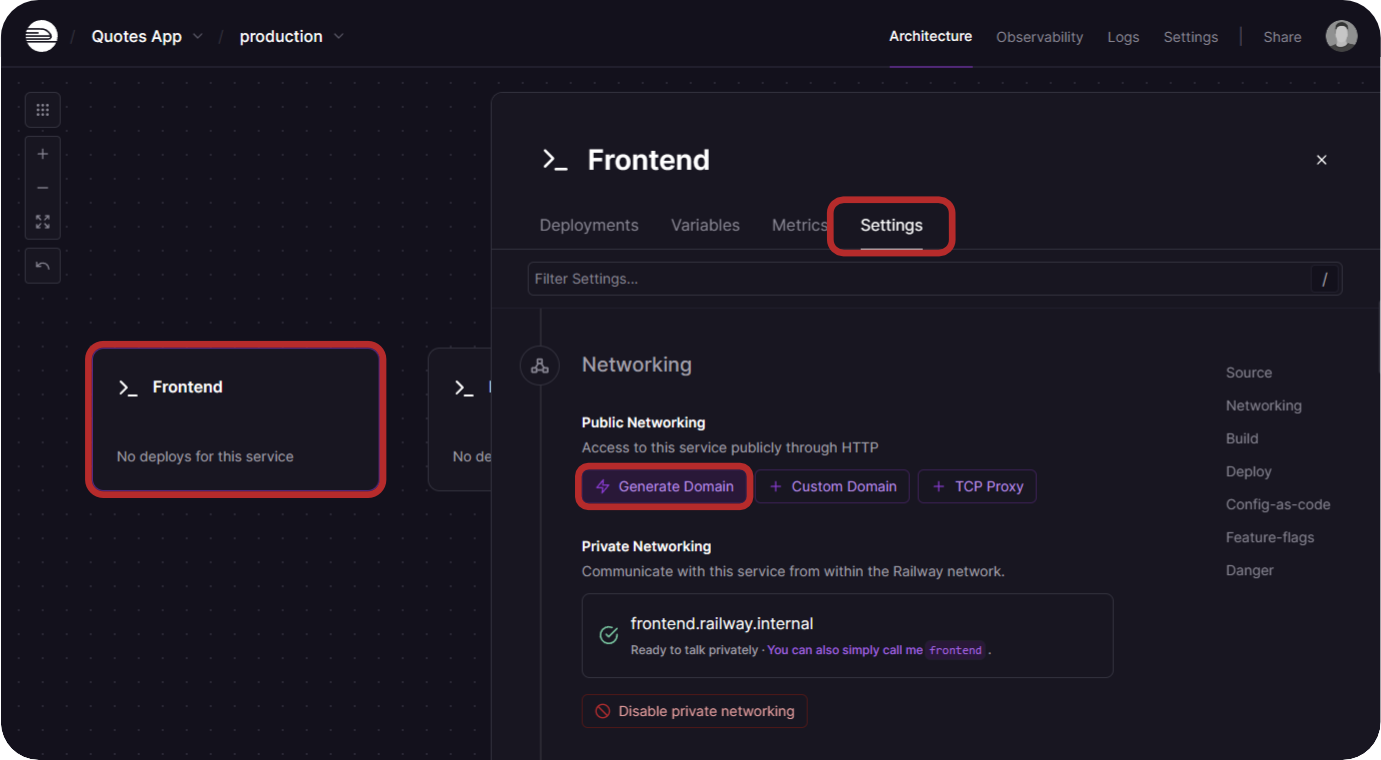
-
Click on
Generate Domain -
Do these steps for both services, so that they both have public domains.
5. Variable setup
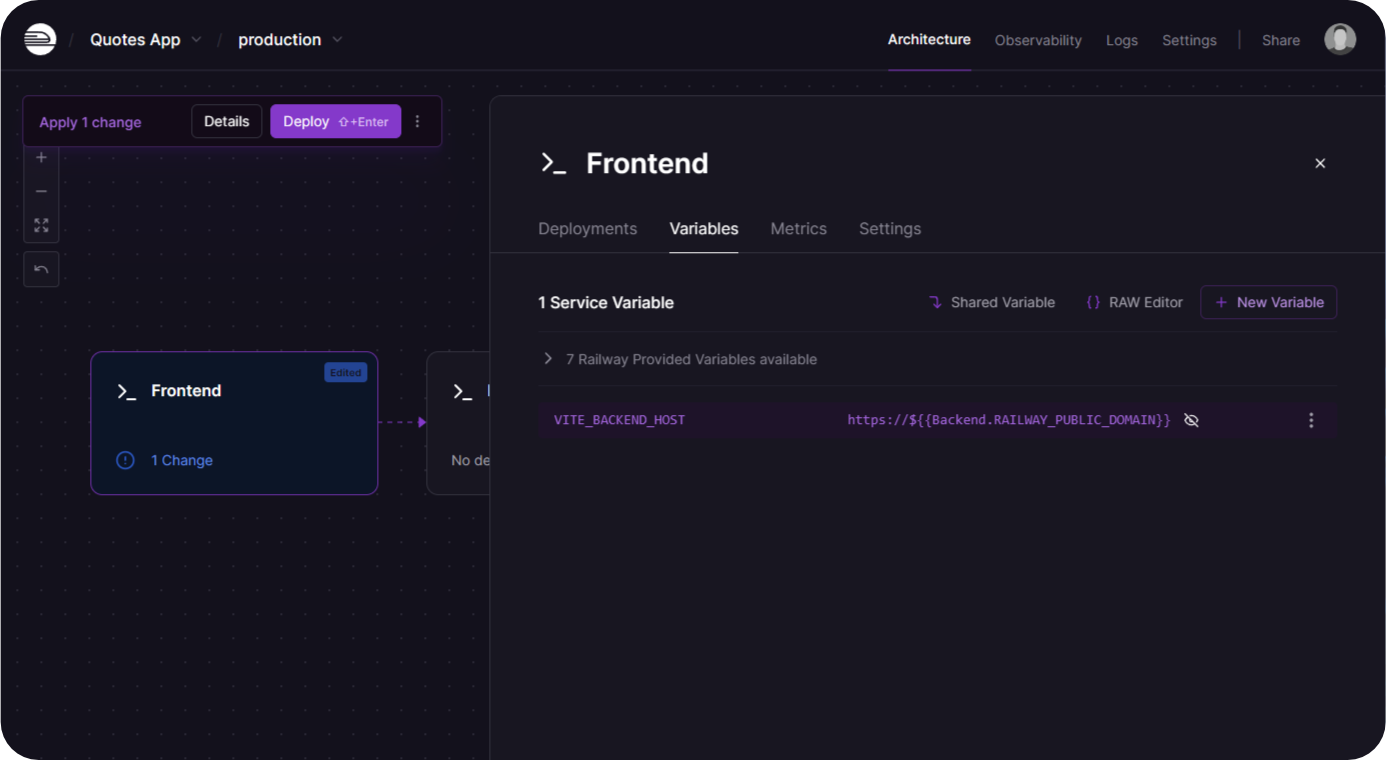
For our example monorepo the Frontend service needs a VITE_BACKEND_HOST variable, and our backend needs an ALLOWED_ORIGINS variable.
Let's add the Frontend variable first.
-
Click on Frontend service, then the
Variablestab -
Add the required variable -
VITE_BACKEND_HOST=${{Backend.RAILWAY_PUBLIC_DOMAIN}}
It should look like this once added:
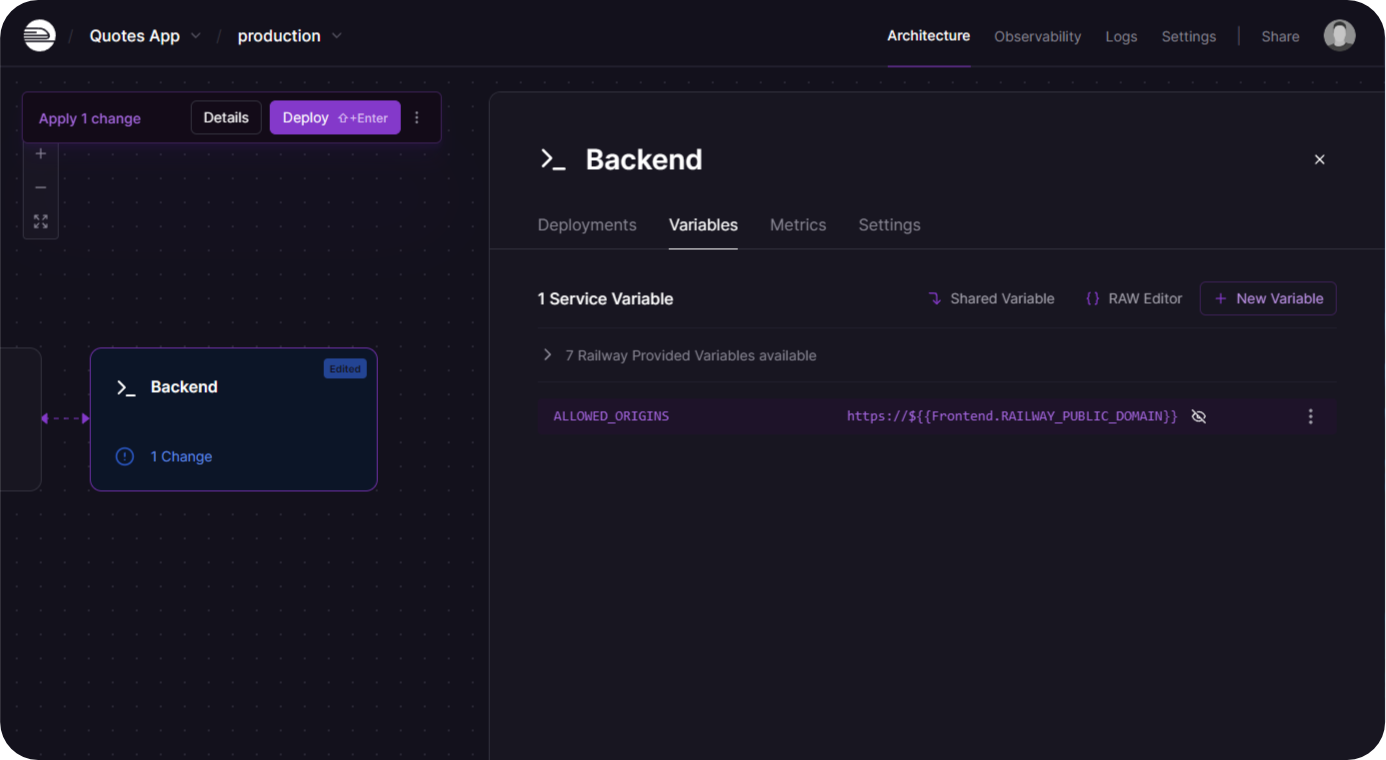
Now let's add the Backend variable.
-
Click on the Backend service, then the
Variablestab -
Add the required variable -
ALLOWED_ORIGINS=${{Frontend.RAILWAY_PUBLIC_DOMAIN}}
It should look like this once added:
- Click the
Deploybutton to save these changes.
Notes:
-
The variables used here are reference variables, learn more about them here.
-
Both the Frontend and Backend variables reference each other's public domains. The
RAILWAY_PUBLIC_DOMAINvariable will be automatically updated whenever you deploy or re-deploy a service. -
See a list of additional variables here.
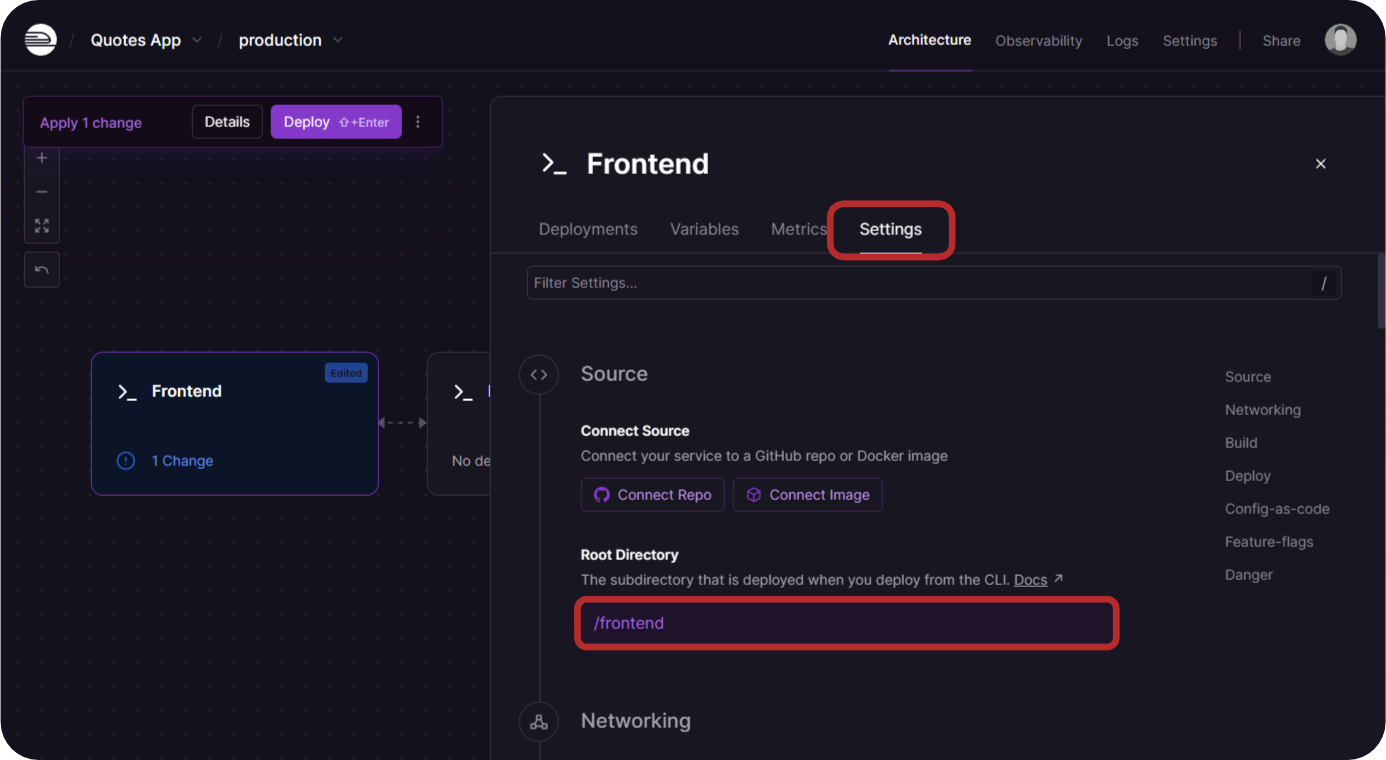
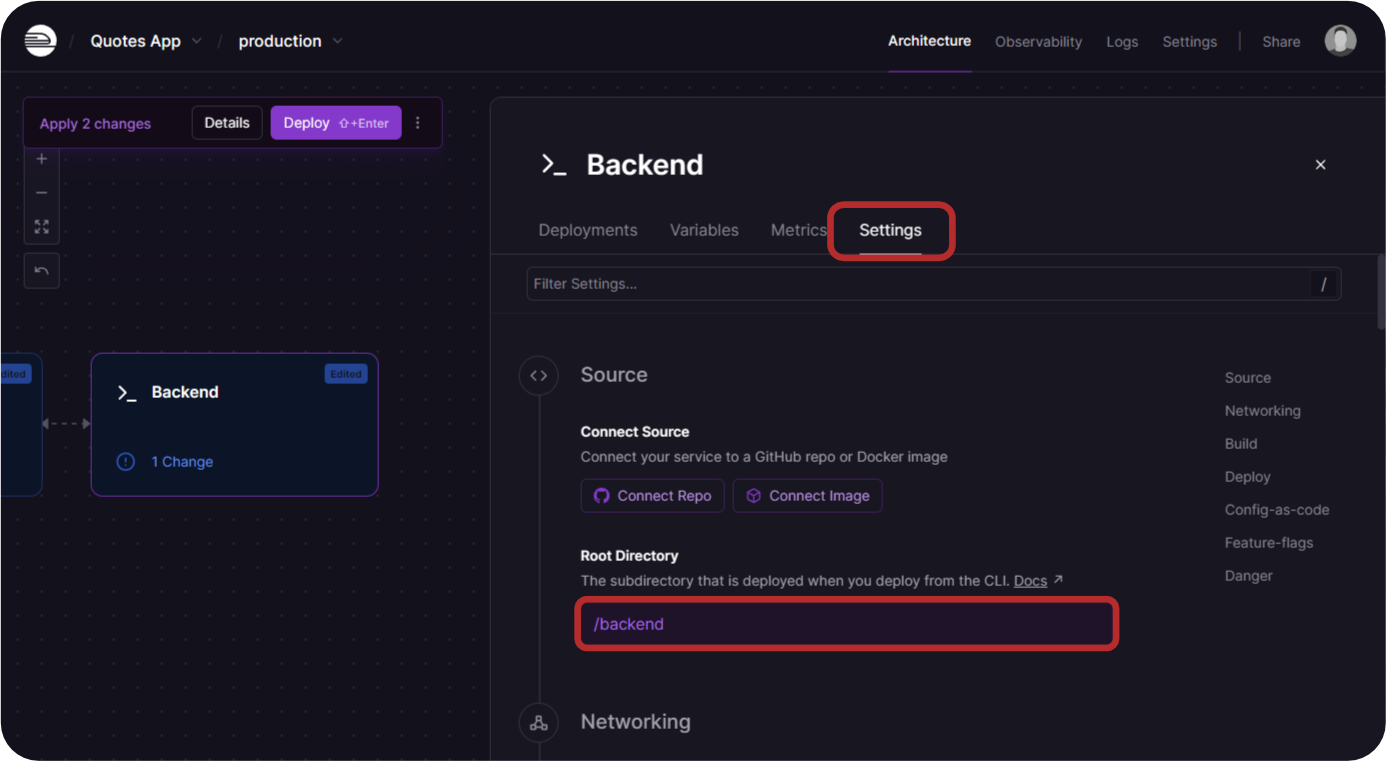
6. Directory setup
Both of our apps deploy from subdirectories of our monorepo, so we need to tell Railway where they are located.
- Open the Frontend service to its service settings and you will see a Root Directory option, in this case, we will set it to
/frontend
- Open the Backend service settings and we will set its root directory to
/backend
- Click the
Deploybutton to save these changes.
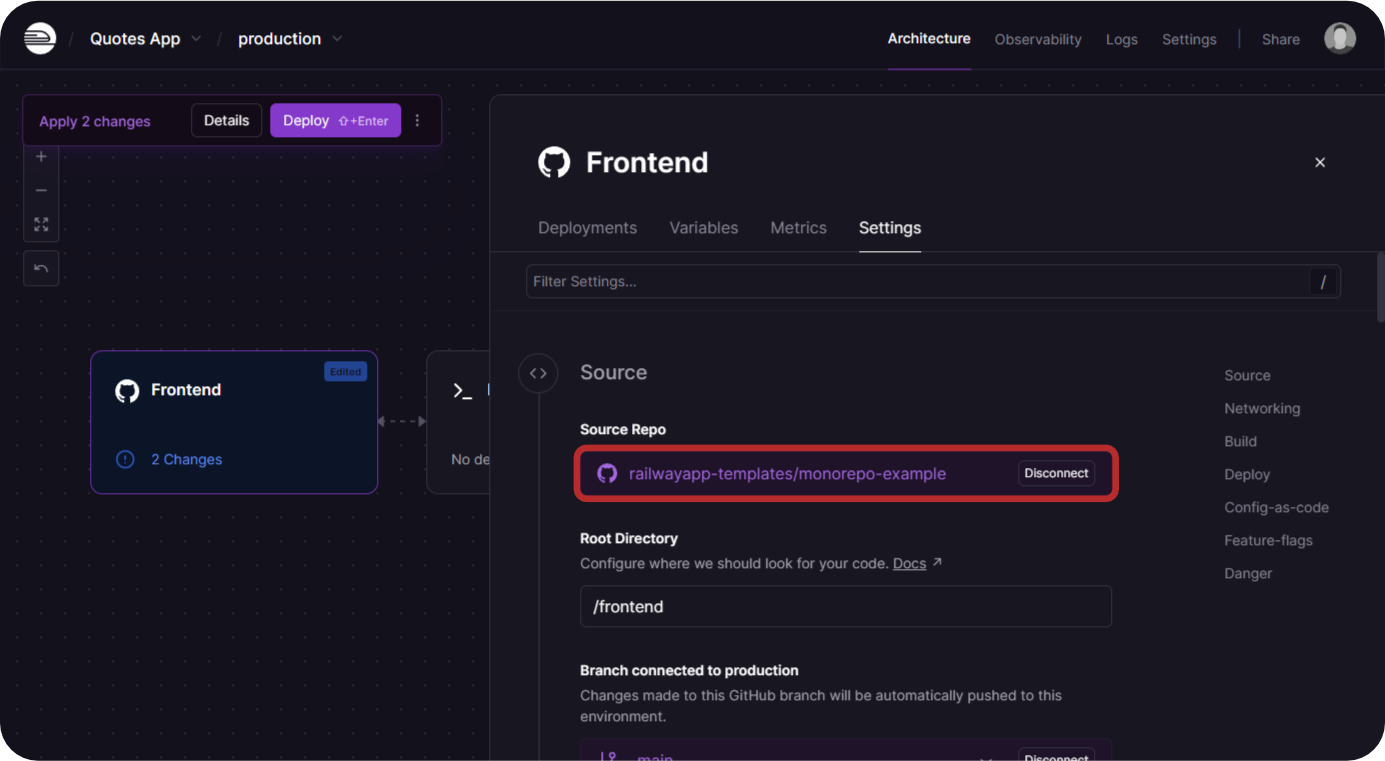
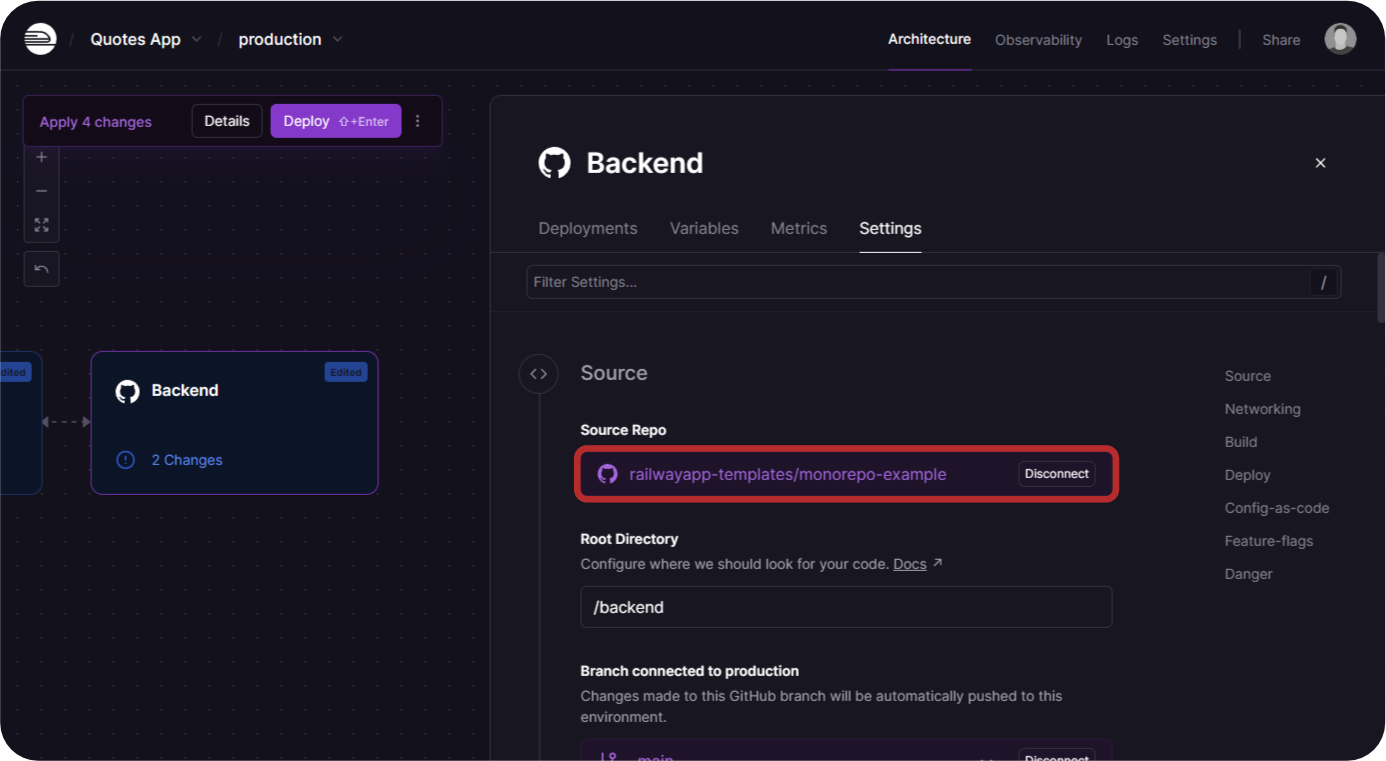
7. Connecting the Repo
Now we need to configure the source of the service where the code is deployed.
- Open the service settings for each service and connect your monorepo.
Frontend
Backend
- Click the
Deploybutton to finally deploy your applications
Your services should now start building and then deploy.
Conclusion
Congratulations! You have setup a project, setup services, added variables and deployed your monorepo project to Railway. The Frontend service should be accessible on its public domain to access the deployed website.
Edit this file on GitHub