
Deploy a Sails App
Sails is a MVC framework for Node.js. It is designed to emulate the familiar MVC pattern of frameworks like Ruby on Rails, but with support for the requirements of modern apps: data-driven APIs with a scalable, service-oriented architecture.
Sails makes it easy to build custom, enterprise-grade Node.js apps.
Create a Sails App
Note: If you already have a Sails app locally or on GitHub, you can skip this step and go straight to the Deploy Sails App on Railway.
To create a new Sails app, ensure that you have Node installed on your machine.
Run the following command in your terminal to install Sails:
npm install sails -gNext, run the command below to create a new Sails app
sails new workappSelect Web App as the template for your new Sails app. Once the dependencies have been installed, cd into the workapp directory and run sails lift to start your app.
Open your browser and go to http://localhost:1337 to see your app.
Now, let's deploy to Railway!
Deploy Sails App on Railway
Railway offers multiple ways to deploy your Sails app, depending on your setup and preference. Choose any of the following methods:
One-Click Deploy from a Template
If you’re looking for the fastest way to get started, the one-click deploy option is ideal. It sets up a Sails app along with a Postgres database and Redis.
Click the button below to begin:

After deploying, we recommend that you eject from the template to create a copy of the repository under your own GitHub account. This will give you full control over the source code and project.
Deploy from the CLI
To deploy the Sails app using the Railway CLI, please follow the steps:
- Install the Railway CLI:
- Install the CLI and authenticate it using your Railway account.
- Initialize a Railway Project:
- Run the command below in your Sails app directory.
railway init - Follow the prompts to name your project.
- After the project is created, click the provided link to view it in your browser.
- Run the command below in your Sails app directory.
- Modify Sails Config:
- Open up
config/env/production.jsfile and make some changes:- Set
http.trustProxytotruebecause our app will be behind a proxy. - Set
session.cookie.securetotrue - Add this function to the
socketobject just after theonlyAllowOriginsarray:beforeConnect: function(handshake, proceed) { // Send back `true` to allow the socket to connect. // (Or send back `false` to reject the attempt.) return proceed(undefined, false); },
onlyAllowOriginsarray. The function simply rejects socket connection attempts. - Set
- Open up
- Deploy the Application:
- Use the command below to deploy your app:
railway up - This command will scan, compress and upload your app's files to Railway. You’ll see real-time deployment logs in your terminal.
- Use the command below to deploy your app:
- Note: You'll come across an error about how the default
sails-diskadapter andconnect.session()MemoryStore is not designed for use as a production database, don’t worry. We’ll fix this in the next step.
- Add a Database Service:
- Run
railway add. - Select
PostgreSQLby pressing space and hit Enter to add it to your project. - A database service will be added to your Railway project.
- Run
- Add a Redis Database Service:
- Run
railway add. - Select
Redisby pressing space and hit Enter to add it to your project. - A redis database service will be added to your Railway project.
- Run
- Modify Sails Database Config:
- Open up
config/env/production.jsfile and make some changes to let your app know what database to connect to and where to save sessions:- In the
datastores:section,- Add
adapter: 'sails-postgresql', - Add
url: process.env.DATABASE_URL
- Add
- In the
session:section,- Add
adapter: '@sailshq/connect-redis', - Add
url: process.env.REDIS_URL,
- Add
- In the
- Run
npm install sails-postgresql --saveto add the new adapter to your app locally.
- Open up
- Configure Environment Variables on Railway:
- Go to your app service Variables section and add the following:
DATABASE_URL: Set the value to${{Postgres.DATABASE_URL}}(this references the URL of your new Postgres database). Learn more about referencing service variables.REDIS_URL: Set the value to${{Redis.REDIS_URL}}(this references the URL of your new Redis Database)
- Use the Raw Editor to add any other required environment variables in one go.
- Go to your app service Variables section and add the following:
- Redeploy the Service:
- Click Deploy on the Railway dashboard to apply your changes.
- Verify the Deployment:
- Once the deployment completes, go to View logs to check if the server is running successfully.
- Set Up a Public URL:
- Navigate to the Networking section under the Settings tab of your new service.
- Click Generate Domain to create a public URL for your app.

Deploy from a GitHub Repo
To deploy the Sails app to Railway, start by pushing the app to a GitHub repo. Once that’s set up, follow the steps below to complete the deployment process.
- Create a New Project on Railway:
- Go to Railway to create a new project.
- Deploy from GitHub:
- Select Deploy from GitHub repo and choose your repository.
- If your Railway account isn’t linked to GitHub yet, you’ll be prompted to do so.
- Select Deploy from GitHub repo and choose your repository.
- Add Environment Variables:
- Click Add Variables and configure all the necessary environment variables for your app.
- Deploy the App:
- Click Deploy to start the deployment process.
- Once the deployed, a Railway service will be created for your app, but it won’t be publicly accessible by default.
- Add a Database Service:
- Right-click on the Railway project canvas or click the Create button.
- Select Database.
- Select Add PostgreSQL from the available databases.
- This will create and deploy a new Postgres database service for your project.
- Add a Redis Database Service:
- Right-click on the Railway project canvas or click the Create button.
- Select Database.
- Select Add Redis from the available databases.
- This will create and deploy a new Redis database service for your project.
- Configure Environment Variables:
- Go to your app service Variables section and add the following:
DATABASE_URL: Set the value to${{Postgres.DATABASE_URL}}(this references the URL of your new Postgres database). Learn more about referencing service variables.REDIS_URL: Set the value to${{Redis.REDIS_URL}}(this references the URL of your new Redis Database)
- Use the Raw Editor to add any other required environment variables in one go.
- Go to your app service Variables section and add the following:
- Redeploy the Service:
- Click Deploy on the Railway dashboard to apply your changes.
- Verify the Deployment:
- Once the deployment completes, go to View logs to check if the server is running successfully.
- Set Up a Public URL:
- Navigate to the Networking section under the Settings tab of your new service.
- Click Generate Domain to create a public URL for your app.
This guide covers the main deployment options on Railway. Choose the approach that suits your setup, and start deploying your Sails apps effortlessly!
Here’s how your setup should look:
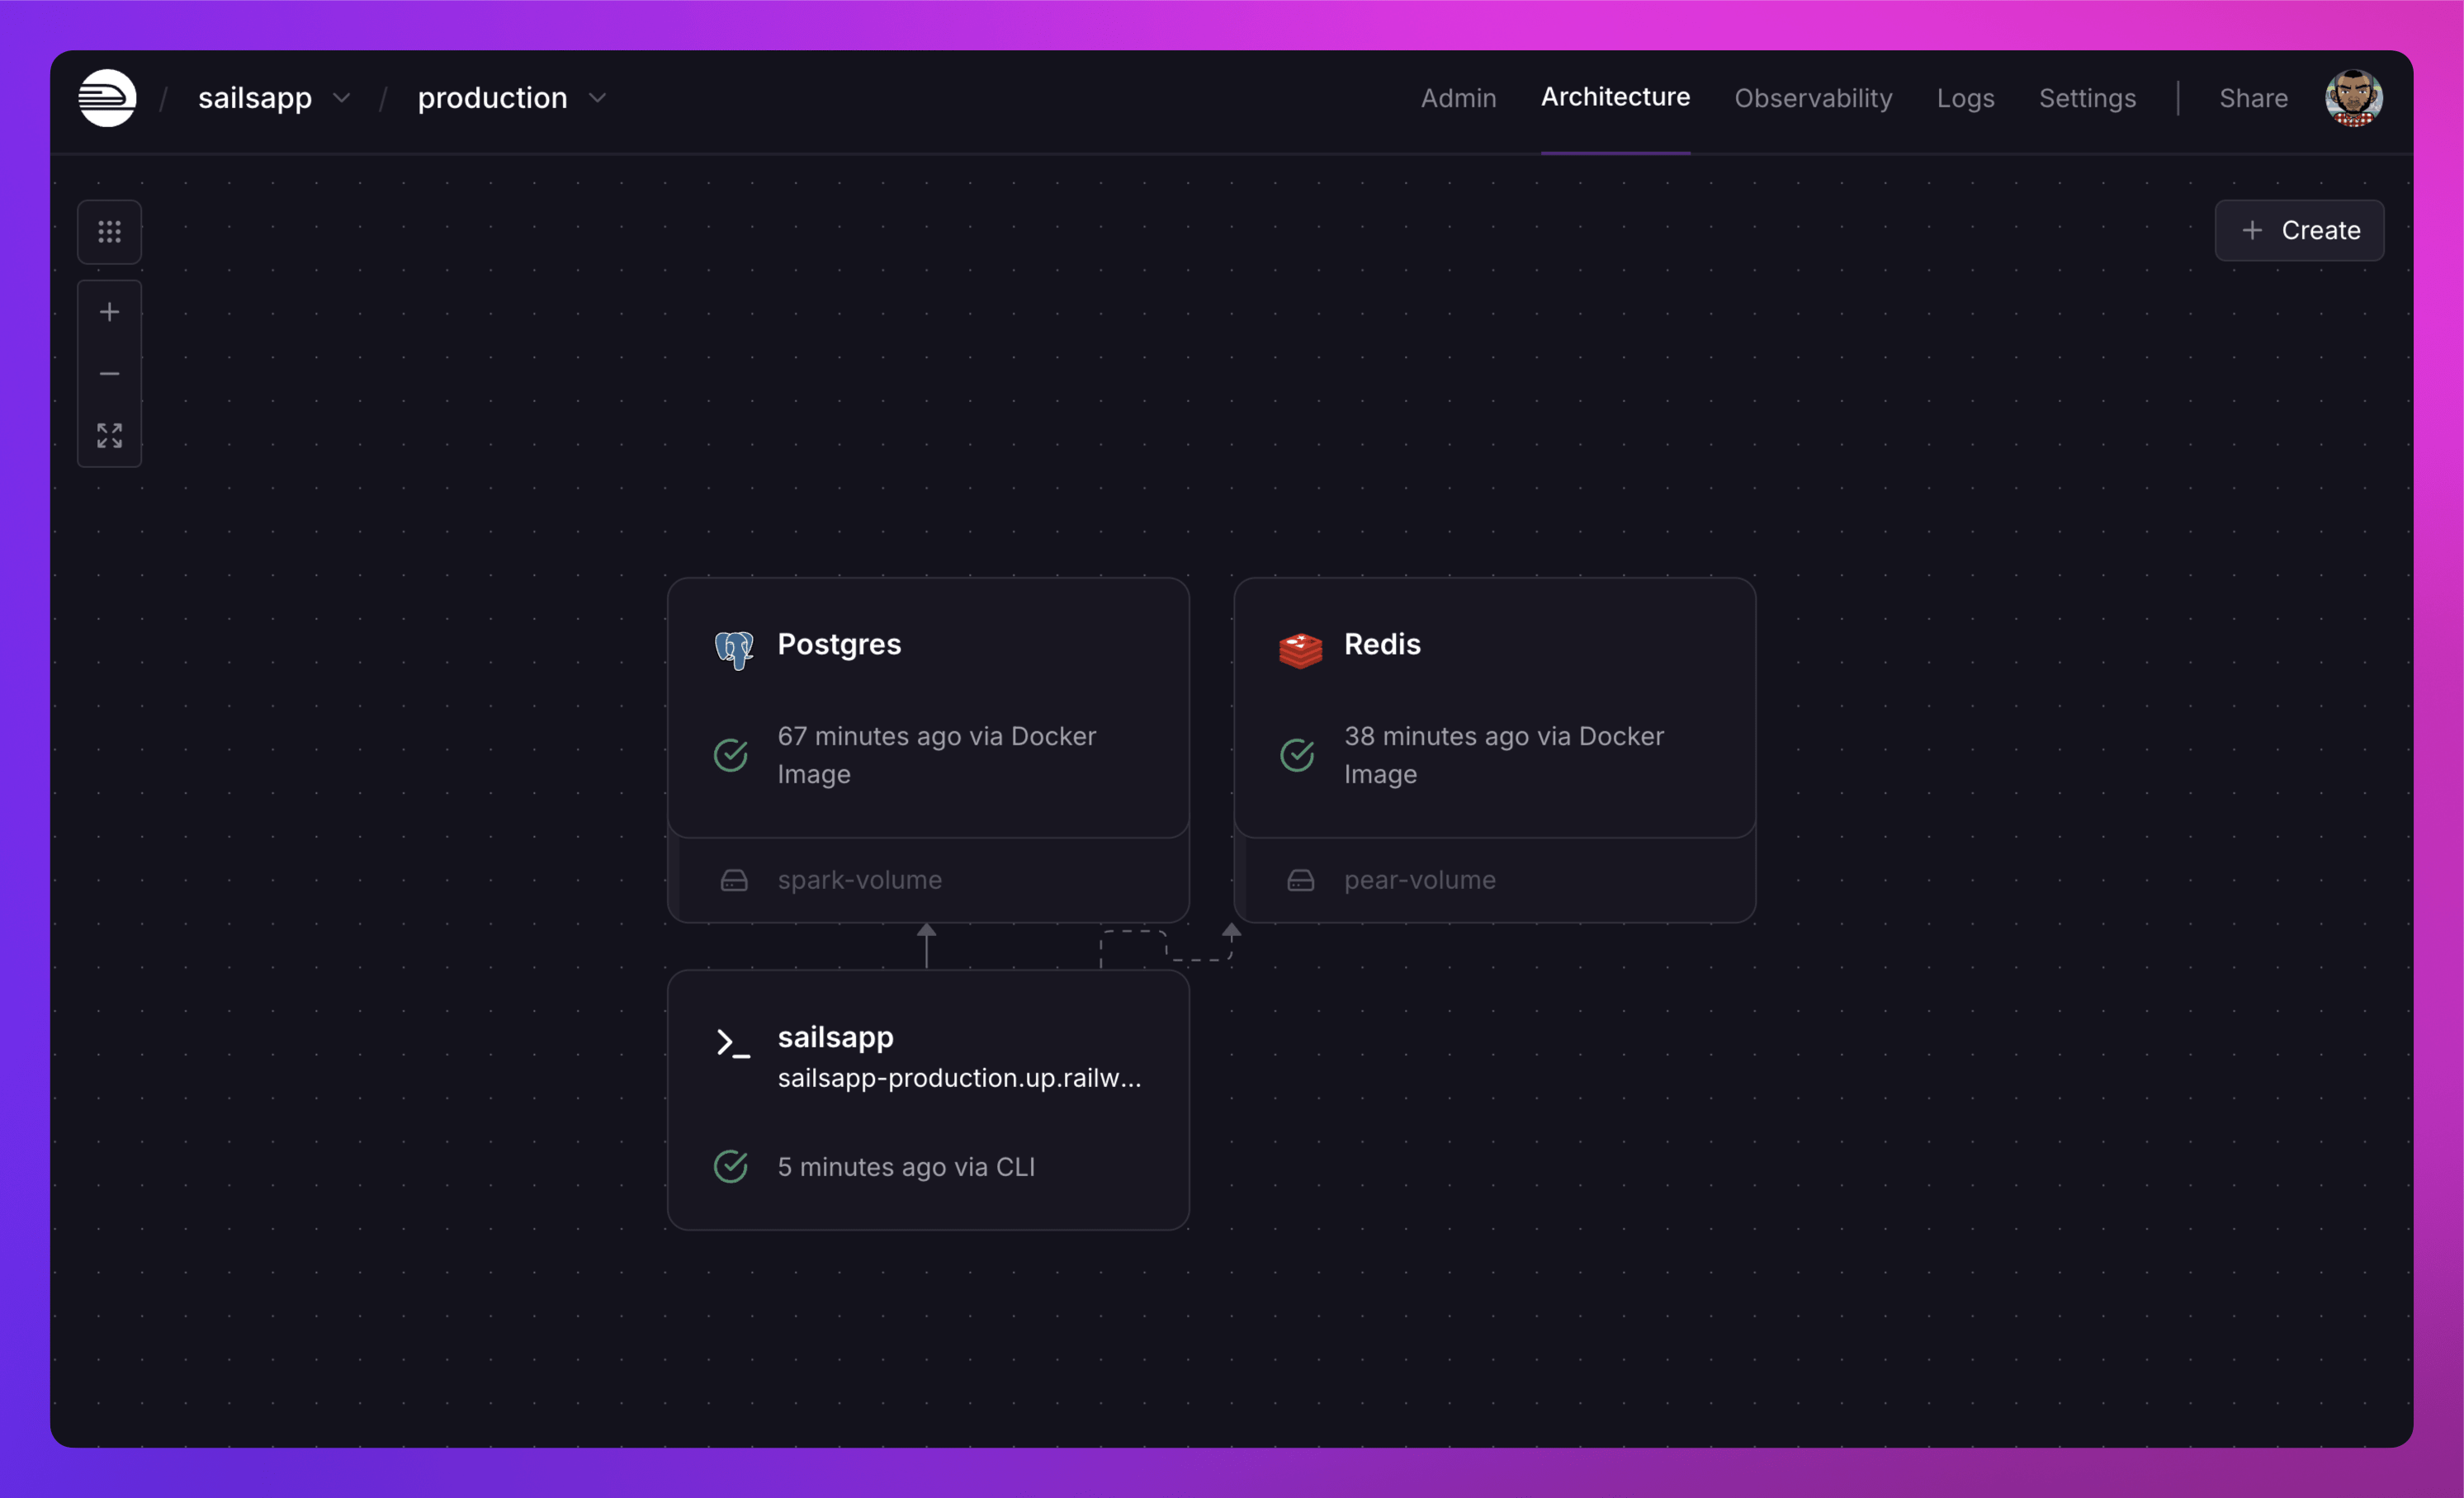
By following these steps, you’ll have a fully functional Sails app. If you run into any issues or need to make adjustments, check the logs and revisit your environment variable configurations.
Next Steps
Explore these resources to learn how you can maximize your experience with Railway:
Edit this file on GitHub